Data transfer
Note
Personal information and other sensitive data, including statutory, regulatory, and contractually protected data — for example, human subjects research, restricted research, student and educational data, and personal health information (PHI) — are prohibited on the Hoffman2 Cluster.
Data transfer nodes
The Hoffman2 Cluster has two dedicated and performance-tuned data transfer nodes with advanced parallel transfer tools to support your research workflows 1. For transferring large files and/or large datasets, you will need to use the data transfer nodes. 2 3
dtn.hoffman2.idre.ucla.edu
As all connections are based on a secure protocol, when logging in for the first time, for security reasons, you will be asked to confirm the authenticity of the host you are connecting to by double checking the hostkey fingerprint.
Footnotes
Tools
There are several methods to transfer data between a local computer and the Hoffman2 Cluster and we will cover some on this page.
Depending on your network connection and the amount of data to transfer between your local computer and the Hoffman2 Cluster, you have options under graphical or command-line interface utilities.
Tip
To move large files and/or large datasets, we recommend using other parallel transfer tools, e.g. Globus, rclone.
Graphical utilities
Many of the graphical utilities support a file manager with “drag and drop” functionality between your local and remote computers. You may use whichever tool you prefer…
Application |
Website |
Transfer Protocols |
Platform |
|---|---|---|---|
CyberDuck |
SFTP |
Windows, macOS |
|
FileZilla |
SFTP |
Windows, macOS, Linux |
|
SFTP |
Windows |
||
WinSCP |
SFTP |
Windows |
|
Windows, macOS, Linux |
Command-line utilities
Application |
Platform |
Features |
|---|---|---|
secure copy |
||
secure file transfer |
||
macOS and Linux |
sync files to and from |
|
curl |
macOS and Linux |
xfr data using various protocols |
wget |
macOS and Linux |
download via HTTP/HTTPS |
Windows, macOS, Linux |
rsync for cloud storage |
Footnotes
- 4(1,2)
Git for Windows provides a BASH emulation with SSH/SCP/SFTP clients. Git for Windows
- 5(1,2)
Windows Subsystem for Linux (WSL). WSL is supported on Windows 10 64-bit (Build 16215 or later)
Cloud storage services
Important
If you have data use questions, please contact UCLA IT Services client support, via email - clientsupport@it.ucla.edu
Faculty and staff use of cloud storage services must comply with applicable University policies, notably policies relating to the protection of University data and the University of California Electronic Communications Policy. This includes the data use requirements, which are based on University-negotiated agreements established to help safeguard information about individuals and other confidential information for which the campus is a steward.
Always employ due care when processing, transmitting, or storing sensitive information. Violation of these data use requirements or other campus policies may result in disciplinary action up to and including termination.
Box
Box is an online cloud storage and collaboration tool that provides users with the ability to easily store, access, and share files and folders anywhere on any device.
UCLA provides a free enterprise Box account to all faculty, staff and students. Currently, a UCLA enterprise Box account comes with unlimited storage space for faculty, staff and students. All accounts offer a 15 gigabyte per file upload limit and other enterprise features such as version history.
- NOTE
If you need assistance with your Box account, please contact the UCLA IT Services support center at help@it.ucla.edu or by phone at (310) 267-HELP (4357).
To transfer data between the Hoffman2 Cluster and your Box account, you can use Globus or the rclone application.
Google Drive
Google Drive is a file storage and synchronization service developed by Google. Google Drive allows users to store files on their servers, synchronize files across devices, and share files. Google Apps is made available to UCLA as part of the UC Office of the President agreement. Google Apps is not appropriate for storing or sharing any sensitive data, including but not limited to: HIPAA regulated data, credit card information, social security numbers, and driver’s license numbers.
- NOTE
If you need assistance with your Google Apps for UCLA, please contact the UCLA IT Services support center at help@it.ucla.edu or by phone at (310) 267-HELP (4357).
To transfer data between the Hoffman2 Cluster and your Google Drive account, you can use Globus or the rclone application.
Globus
Note
For more information about Globus please refer to their website.
What is Globus?
Globus is a software tool to transfer files (from kilobytes to petabytes) across the web in a reliable, high-performance and secure way. It provides fault-tolerant, fire-and-forget data transfer using simple web or command line interfaces. It is appropriate for transferring very large files either between your local computer and a remote machine like the Hoffman2 Cluster, or between two remote machines on which you have accounts; both remote machines need to be part of the Globus project. All XSEDE resources are configured as Globus endpoints.
Important
Globus Connect comes in two flavors: Globus Connect Personal is designed for use by a single user on a personal machine; Globus Connect Server is designed to be installed by a system administrator on multi-user computing and storage resources, like the Hoffman2 Cluster data transfer nodes.
Globus subscription
UCLA has purchased a Globus subscription which gives its users additional capabilities, such as:
Globus Plus users: Users can create shared endpoints on their personal computers (using Globus Connect Personal) and transfer files between Globus Connect Personal endpoints.
Premium storage connectors: Enables users to add Globus endpoints hosted on non-POSIX filesystems, including various object stores and archival storage systems, such as Globus for Amazon S3, Globus for Google Drive, Globus for Box. In other words, connect your cloud storage to Globus for data transfer and file sharing.
To get access
To get access to these additional capabilities, your account needs to be added to the site subscription. To do so, please submit a ticket to our helpdesk requesting access to the Globus UCLA group and provide your UCLA Logon ID. Your UCLA Logon ID is your campus identifier and doubles as your @ucla.edu email address.
Globus Connect Server
The Globus Connect Server software is installed on our Data transfer nodes and is used to connect our Hoffman2 Cluster storage to Globus, which allows Hoffman2 Cluster users to transfer data in and out of the cluster.
Globus Connect Personal
Creates a Globus endpoint on your local computer and allows you to transfer and share files (for file sharing, you must be a member of UCLA site license, see above to get access to the subscription ), even if you don’t have administrative privileges on your machine. Globus Connect Personal is available for macOS, Windows, and Linux operating systems.
How does Globus Connect Personal work?
The Globus service manages transfers to and from a Globus Connect Personal endpoint (your local computer). Globus Connect Personal uses GSI SSH to maintain a control connection to the Globus service and receive commands. Data are always transferred directly between the Globus Connect Personal endpoint and the destination endpoint – data does not “flow through” Globus in any way.
Installation
To transfer files to/from your local computer, you will need to download and install the Globus Connect Personal software. Open your web browser and click on one of the detailed installation instruction links for the platform running on your local computer - macOS, Linux, Windows.
- Globus Connect Personal is available,
for Mac OS 10.7 or higher (Intel only)
for common x86-based Linux distributions
for Windows 7, Windows 8, and Windows 10
Please follow this guide to install Globus Connect Personal for Windows.
To download the Globus Connect Personal software, you may be asked to log in to the Globus Web App. You can use your UCLA Logon ID by searching for, “University of California-Los Angeles” from the pull-down menu of organizations.
After downloading the Globus Connect Personal installer, you can run the installation with administrator permissions by holding CTRL + SHIFT on your keyboard and clicking on the Globus Connect Personal installer. Installing as non-administrator: By default, Globus Connect Personal prompts to be installed in C:Program Files. Regular users can not write to this folder. Instead, browse to a place you have write access to (e.g. your Desktop folder).
On the pop-up window for the installer click, “Login.” Your browser should connect to Globus and ask you to provide a name to reference your Globus Connect Personal “Collection,” (i.e. your local computer)..
Please follow this guide to install Globus Connect Personal for macOS
Please follow this guide to install Globus Connect Personal for Linux
Configuration
Right-click the Globus Connect Personal icon in the taskbar and select, Options… to configure Globus Connect Personal.
Configuration options are divided into four groups; the most important (and commonly used) are the Access and General options.
The Access tab lists folders that will be accessible via Globus for file transfer and sharing. You can add folders by clicking the “+” sign and selecting the folder you wish to make accessible to Globus.
Important
By default, the only folder listed is your user’s Documents directory.
To share a folder, add it to the accessible list and check the Shareable box. You must be a Globus Plus user to share files and folders. UCLA does have an active subscription. To be added to the campus’ Globus subscription, please see above to get access.
Note
Drive Mapping: Globus Connect Personal on Windows will translate a path beginning with /~/ into your home directory, e.g. C:\Users\login_id\ (where login_id is replaced with your user name on your local computer). To access paths and drives outside of your home directory, use the syntax /drive_letter/path, for example /C/xinfo lists the C:\xinfo directory. Also, as discussed above, it would be necessary for the C:\xinfo directory to be permitted in the Accessible Folders configuration as well. If the C:\xinfo directory is not permitted in the Accessible Folders configuration, then that folder will not be accessible via your endpoint.
Click the Globus Connect Personal icon in the main menu bar and select Preferences… to configure Globus Connect Personal.

Under Preferences… > Access, you can list what directories are accessible for file transfer and sharing. This provides more control over what information is accessible on your Globus Connect Personal endpoint. By default, your home directory (e.g.: /Users/'login_id') is read/write accessible. The check box Deny access to hidden (e.g. security) files in your home directory option controls whether or not you can access hidden files (i.e. filenames beginning with “.””) in your home directory. By default, Globus Connect Personal does not allow access to hidden files, e.g. ~/.globusonline and ~/.ssh.
Click the “+” icon and select a folder to make it accessible for transfers. To allow a folder to be shared with others, add it to the accessible list and check the Sharable box. You must be a Globus Plus user to share files and folders. UCLA does have an active subscription. To be added to the campus’ Globus subscription, please see above to get access.
Note
If you remove everything from the access list, no files will be accessible on your Globus Connect Personal endpoint and you will be prompted to add accessible paths. You can either click “+” and add directories and files, or click “Reset to Defaults”.
Using Globus
Below are some examples of how to use Globus. For additional how-to guides, please see the Globus documentation site.
Connect to the Hoffman2 Cluster file systems
In order to access the Hoffman2 Cluster file systems from the Globus web application, you will need to link your cluster account with your primary Globus identity from the cluster.
Important
Your primary Globus identity will either be your UCLA Logon ID or your UCLA Mednet ID. When you connect to the Globus website, if you select “University of California-Los Angeles” from the organizational login pull-down menu, your primary identity should be your UCLA Logon ID. If you select, “UCLA Mednet” your primary Globus identity should be your UCLA Mednet ID. To verify from the Globus Web App, click on ‘Account’ and ‘Manage Identities.’
Below is the process required to configure your Hoffman2 Cluster account for the Globus Connect service before you can utilize Globus for transfers to or from the Hoffman2 cluster:
Please log into your Hoffman2 user account and, from the command line, run the
verifymecommand supplying either your UCLA Logon ID or UCLA Mednet ID
For example, user Joe Bruin whose UCLA email address is jbruin@ucla.edu, would type:
verifyme jbruin@ucla.edu
Note
n.b. Mednet users who log into the Single Sign-On (SSO) system with their Mednet username and password should use their jbruin@mednet.ucla.edu email address.
You will soon receive an email with a subject line of “Hoffman2 Globus Connect Registration”
Double check that your Hoffman2 user account is correct in the email
Copy and paste the full
gcs-verifycommand into the shell prompt on the clusterYou should receive a message indicating that you have registered for Globus Connect
Please log into Globus at globus.org, and depending on which identity you linked with your cluster account, choose “University of California-Los Angeles” or “UCLA Mednet” for the organizational login
Once connected to the Globus Web App, select the collection, “Official UCLA Hoffman2 Cluster”
If you still have an issue, please submit a ticket to our helpdesk.
Connect to your UCLA Google Drive or UCLA Box via Globus
This section describes using the Globus web application to connect to your UCLA Google Drive and UCLA Box folders:
Open your web browser and navigate to the Globus website
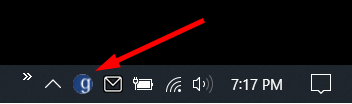
To start the Globus web application, you will need to click the, Log In button. Please use your UCLA Logon ID, by selecting “University of California - Los Angeles” from the pull-down list of organizations
At this point you should be connected to the Globus web application and have landed on the “File Manager”
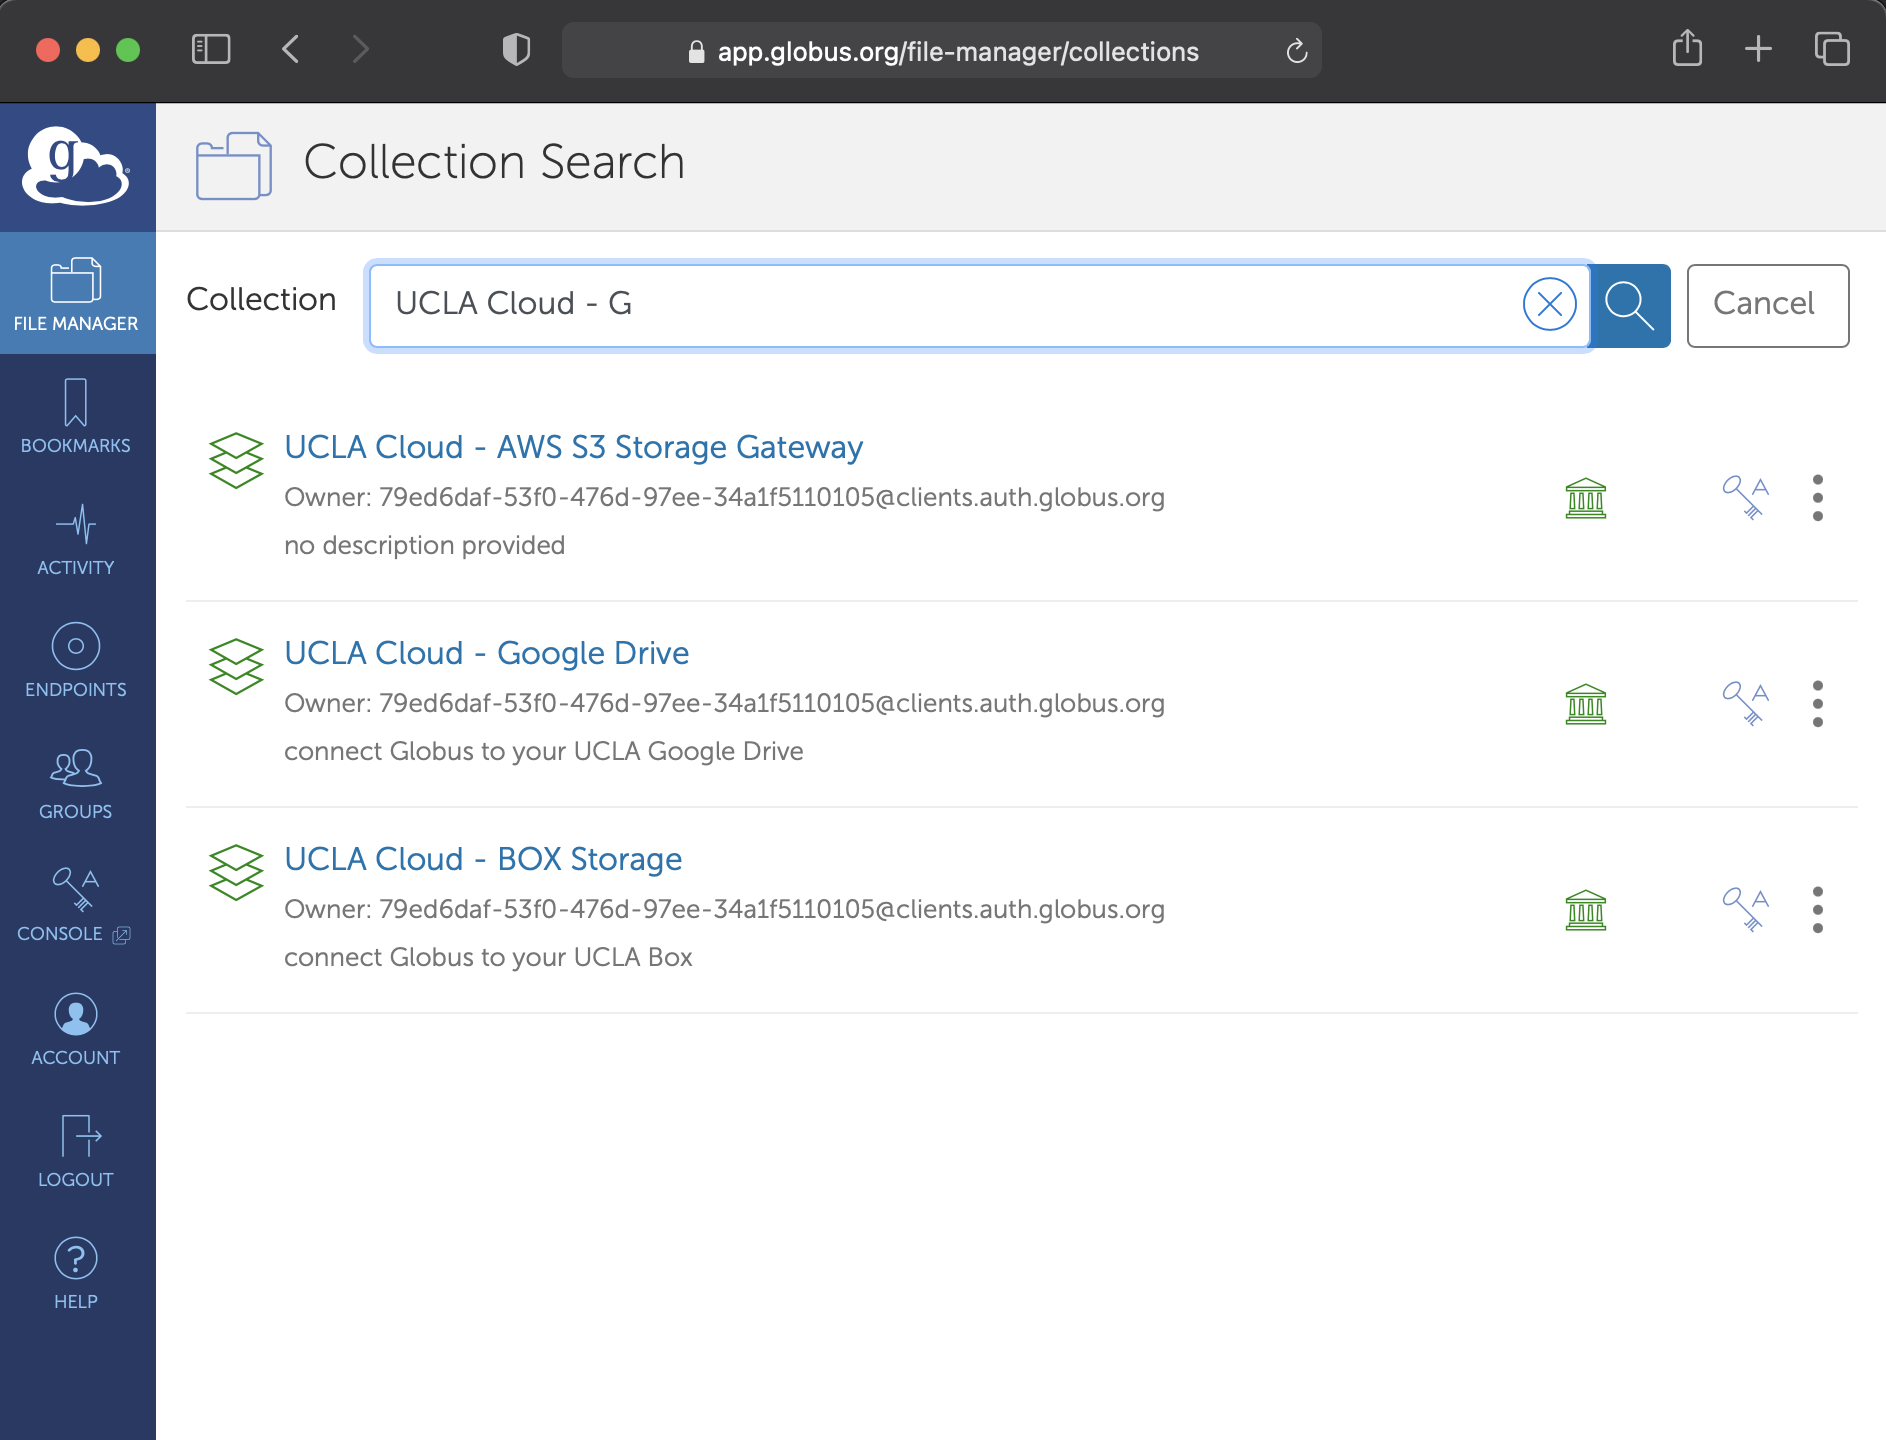
In the text box for “Collection,” please search for “UCLA Cloud - Google Drive” or “UCLA Cloud - BOX Storage” to browse the contents of your UCLA Google Drive or UCLA Box folders
Problems with this answer? Please send comments here.
Transfer data via Globus web application
This section describes using the Globus web app to transfer files to/from a local computer running Globus Connect Personal and the Hoffman2 Cluster.
Be sure the Globus Connect Personal application is running on your local computer
Open your web browser and connect to the Globus web application
Login to the Globus web application with your existing UCLA Login ID or UCLA Mednet ID. To do so, from the pull-down list of organizations, please select “University of California-Los Angeles” or “UCLA Mednet”.
At this point you should be connected to the web application and have landed on the “File Manager”, like the screen shot below …
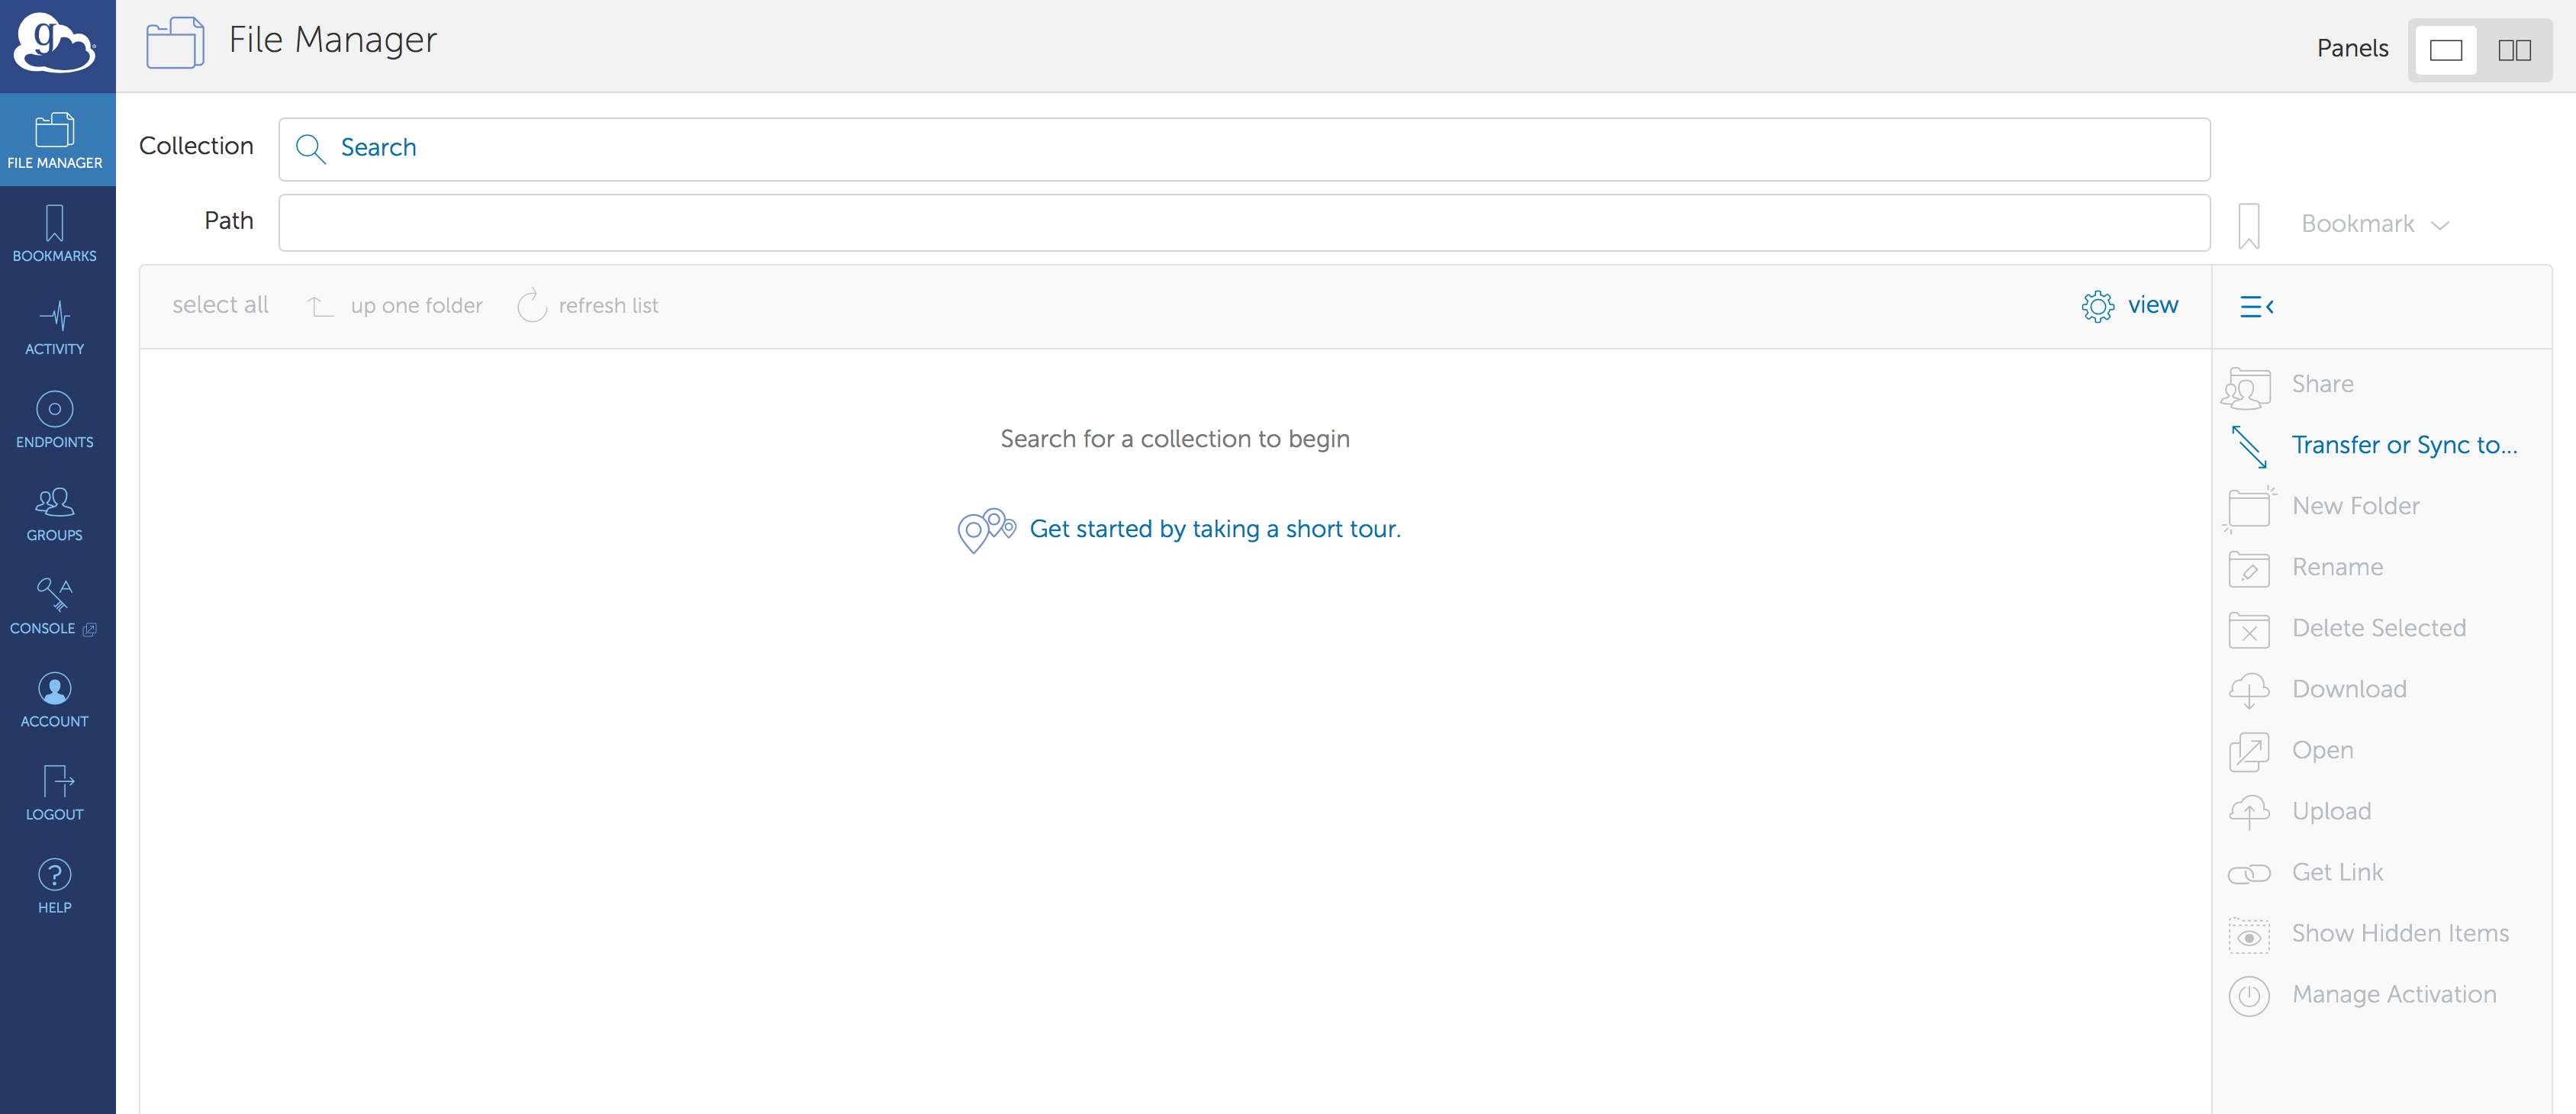
Near the top right-hand of the page, Panels > change the view from single panel to dual panels
This will allow use to connect to two different “collections” - e.g. your local computer and the Hoffman2 Cluster - one on the left panel and the other on the right panel
Tip
A collection is a named location containing data you can access with Globus. Collections can be hosted on many different kinds of systems, including campus storage, HPC clusters, laptops, Amazon S3 buckets, Google Drive, and scientific instruments. When you use Globus, you don’t need to know a physical location or details about storage. You only need a collection name. A collection allows authorized Globus users to browse and transfer files. Collections can also be used for sharing data with others and for enabling discovery by other Globus users
In the first panel, move your cursor to the Collection text box and search for the name of your Globus Connect Personal (running on your local computer) collection. If you do not remember, you should see it below listed under the tab, Your Collections
In the second panel, move your cursor to the Collection text box and search for the name of the Hoffman2 Cluster collection named, “Official UCLA Hoffman2 Cluster”
If the file or directory is located somewhere else on the Hoffman2 Cluster file system, simply type the path, e.g.
/u/scratch/To transfer - select the file or directory on the source panel, and at the bottom of the panel click on Start. That is it!
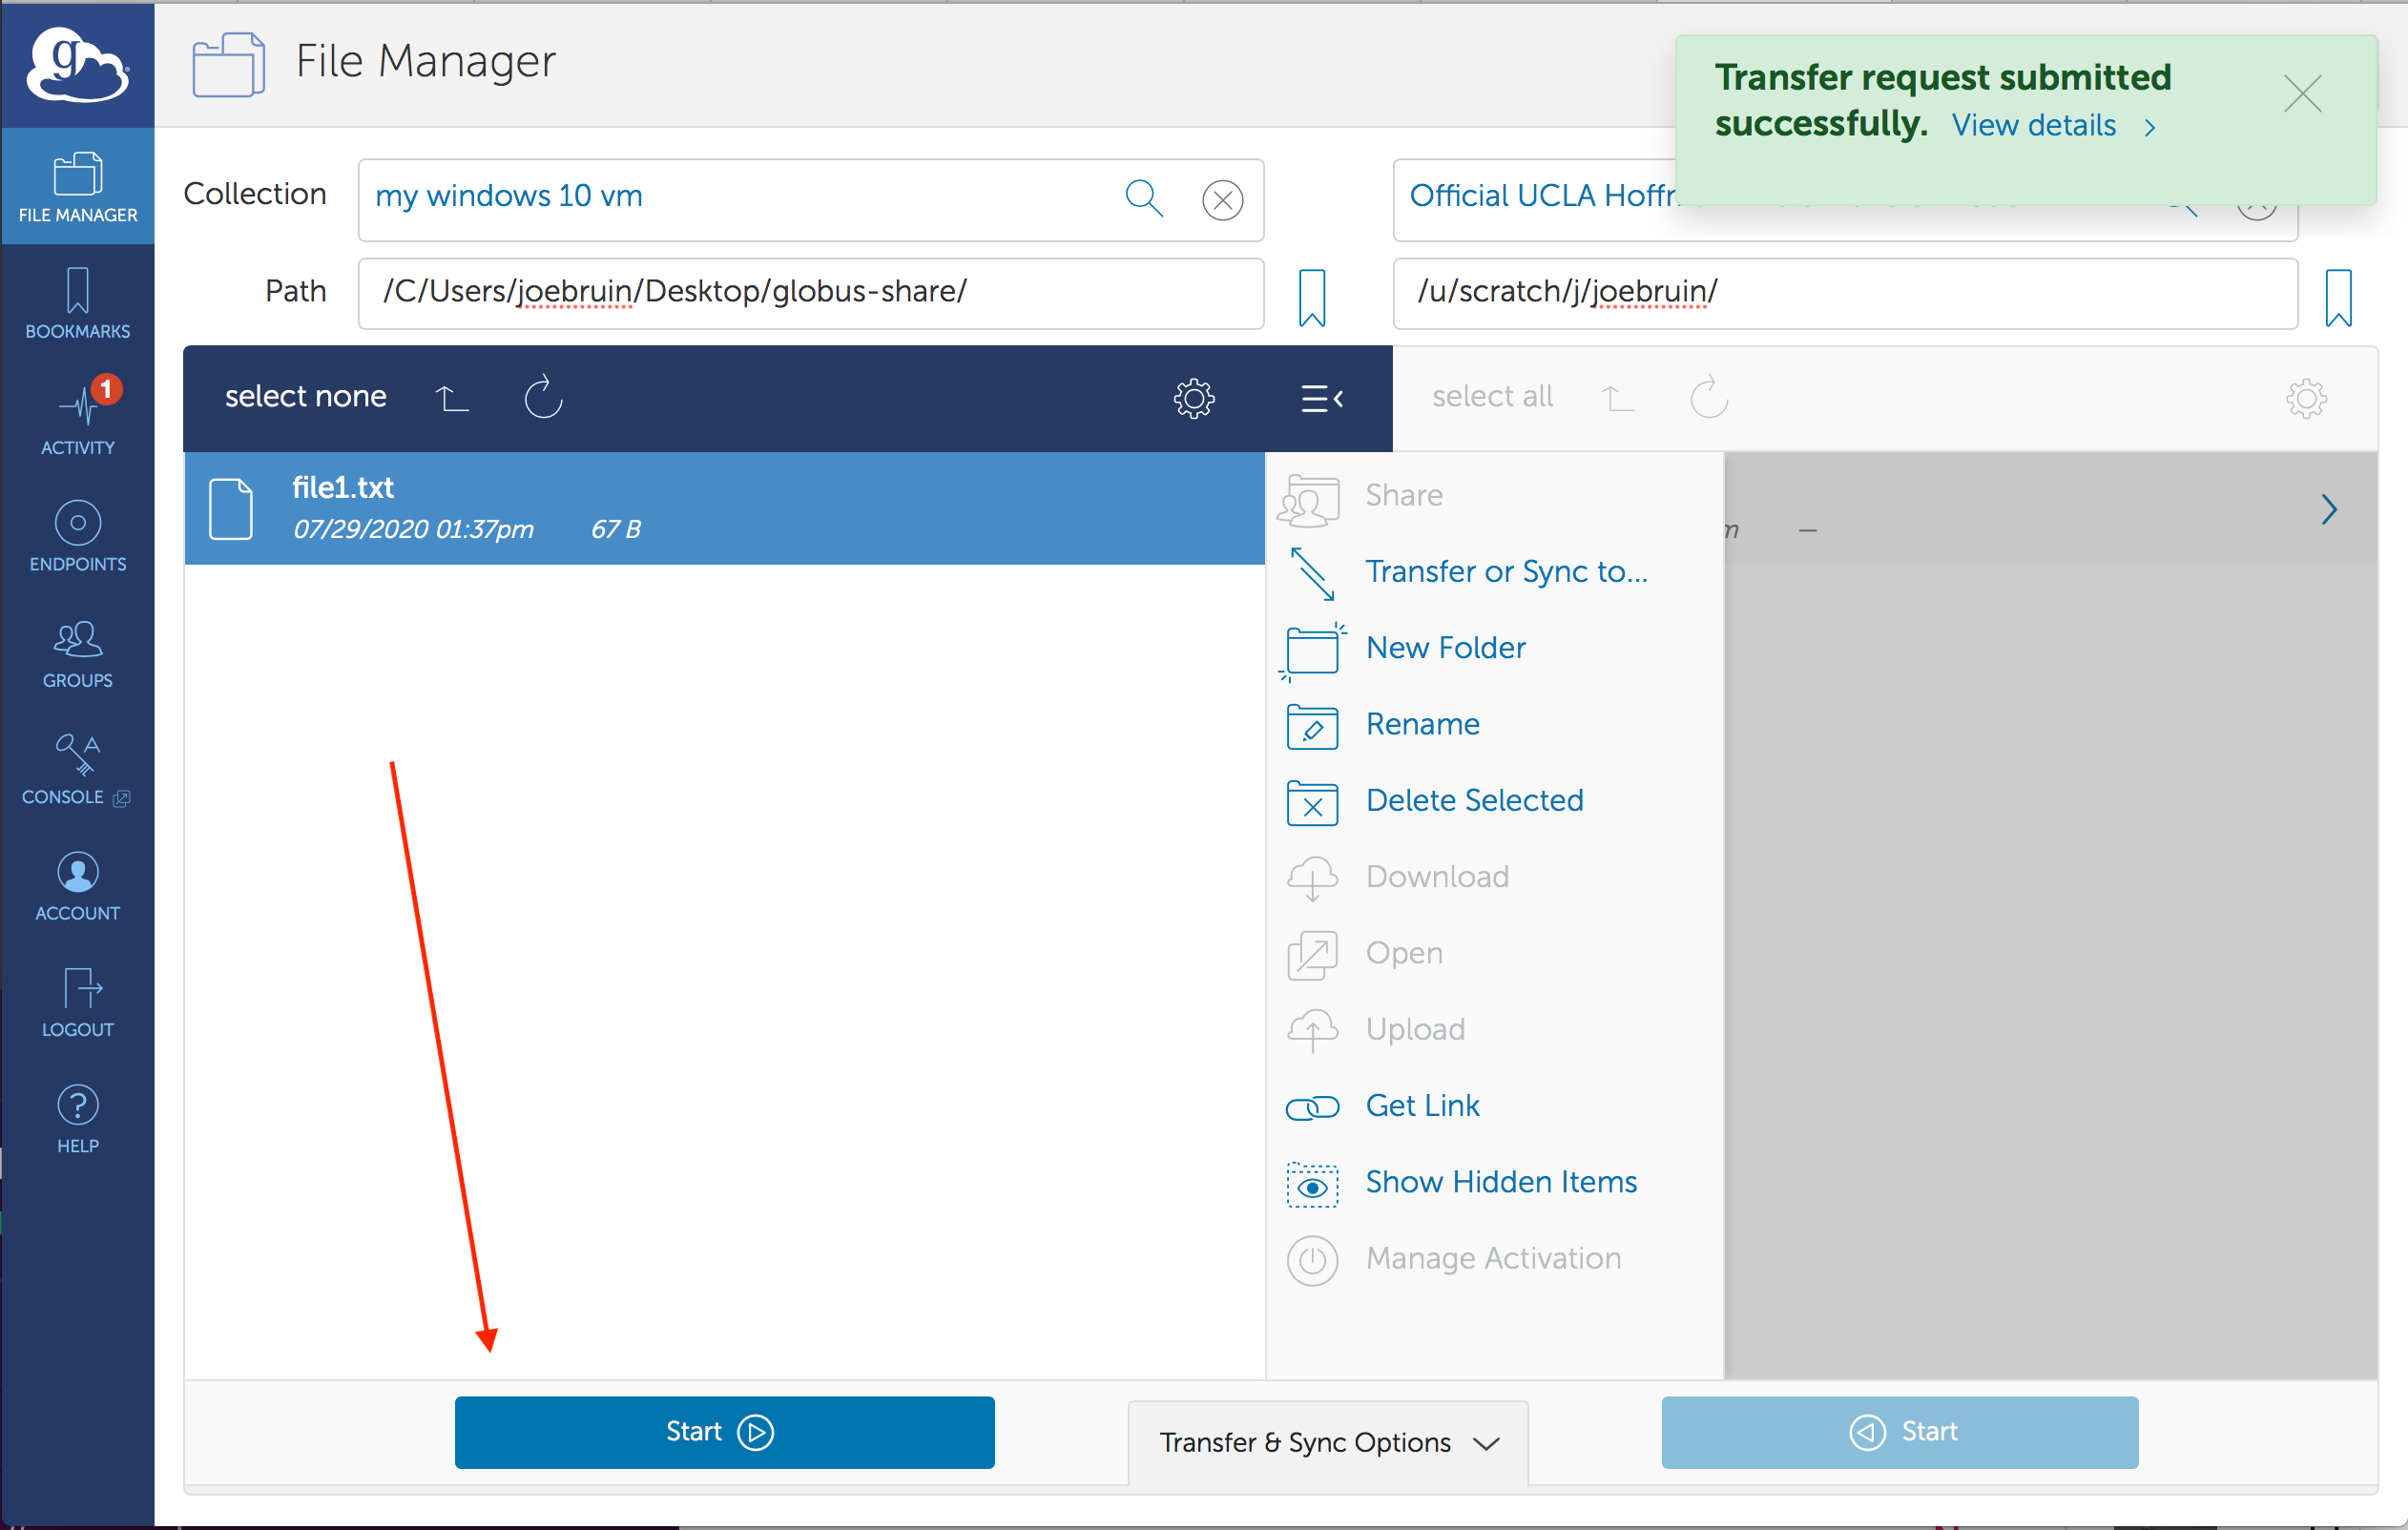
Note
You will receive an email from Globus Notification (no-reply@globus.org) when the file transfer has completed. To have Globus show you the status and history of your file transfers, on the left side of the page, on the navigation menu, click on Activity.
If you have an issue, please submit a ticket to our helpdesk.
rclone
rclone is a command line program to sync files and directories to and from cloud storage - https://rclone.org
Installing rclone
SSH to one of our data transfer nodes. You can connect directly to dtn1.hoffman2.idre.ucla.edu or dtn2.hoffman2.idre.ucla.edu or use the Domain Name Service (DNS) round-robin address, dtn.hoffman2.idre.ucla.edu, which load balances requests between the two servers.
$ ssh login_id@dtn.hoffman2.idre.ucla.eduWhere
login_idis replace by your cluster user name.Note
If you are already logged onto the cluster you could use, either:
$ ssh $USER dtn1
or:
$ ssh $USER dtn2
Download and unzip rclone:
$ wget https://github.com/rclone/rclone/releases/download/v1.51.0/rclone-v1.51.0-linux-amd64.zip
$ unzip rclone-v1.51.0-linux-amd64.zip
You can now copy the rclone executable to your
$HOME/bindirectory. If the copy fails, you need to create$HOME/binsubdirectory, e.g.mkdir $HOME/bin:
$ cp rclone-v1.51.0-linux-amd64/rclone $HOME/bin/.
To run the software, type:
$ rclone
Configuring rclone
Set-up rclone to sync with Box
Tip
More detailed instructions can be found at https://rclone.org/box/
Important
To use rclone with your UCLA Box account, you will need to create an external password for your Box account. To do so, sign into your UCLA Box account, go to “Account Settings” > Under “Authentication”, you will see that you can choose, “Create Password.”
SSH to one of our data transfer nodes and enable trusted X11 forwarding. You can connect directly to dtn1.hoffman2.idre.ucla.edu or dtn2.hoffman2.idre.ucla.edu or use the Domain Name Service (DNS) round-robin address, dtn.hoffman2.idre.ucla.edu, which load balances requests between the two servers.
$ ssh -Y login_id@dtn.hoffman2.idre.ucla.edu
Where login_id is replaced by your cluster user name.
Note
If you are already logged onto the cluster you could use, either:
$ ssh $USER -Y dtn1
or:
$ ssh $USER -Y dtn2
Type, rclone config
$ rclone config
No remotes found - make a new one
n) New remote
s) Set configuration password
q) Quit config
n/s/q>
Type, “n” for new remote [connection]
Enter a name for this connection, e.g. “box”
Enter the type of storage from the menu - Box. Type, “box”
Type of storage to configure.
Enter a string value. Press Enter for the default ("").
Choose a number from below, or type in your own value
1 / 1Fichier
  "fichier"
2 / Alias for an existing remote
  "alias"
3 / Amazon Drive
  "amazon cloud drive"
4 / Amazon S3 Compliant Storage Provider (AWS, Alibaba, Ceph, Digital Ocean, Dreamhost, IBM COS, Minio, etc)
  "s3"
5 / Backblaze B2
  "b2"
6 / Box
  "box"
7 / Cache a remote
  "cache"
8 / Citrix Sharefile
  "sharefile"
9 / Dropbox
  "dropbox"
10 / Encrypt/Decrypt a remote
   "crypt"
11 / FTP Connection
   "ftp"
12 / Google Cloud Storage (this is not Google Drive)
   "google cloud storage"
13 / Google Drive
   "drive"
14 / Google Photos
   "google photos"
15 / Hubic
  "hubic"
16 / In memory object storage system.
   "memory"
17 / JottaCloud
   "jottacloud"
18 / Koofr
   "koofr"
19 / Local Disk
   "local"
20 / Mail.ru Cloud
   "mailru"
21 / Mega
   "mega"
22 / Microsoft Azure Blob Storage
   "azureblob"
23 / Microsoft OneDrive
   "onedrive"
24 / OpenDrive
   "opendrive"
25 / Openstack Swift (Rackspace Cloud Files, Memset Memstore, OVH)
   "swift"
26 / Pcloud
   "pcloud"
27 / Put.io
   "putio"
28 / QingCloud Object Storage
   "qingstor"
29 / SSH/SFTP Connection
   "sftp"
30 / Sugarsync
   "sugarsync"
31 / Transparently chunk/split large files
   "chunker"
32 / Union merges the contents of several remotes
   "union"
33 / Webdav
   "webdav"
34 / Yandex Disk
   "yandex"
35 / http Connection
   "http"
36 / premiumize.me
   "premiumizeme"
Storage>
At the Storage> prompt enter: box.
At the prompt for a “Box App Client Id”, just hit “Enter” to accept the default
Box App Client Id.
Leave blank normally.
Enter a string value. Press Enter for the default ("").
client_id>
At the prompt for a “Box App Client Secret”, just hit “Enter” to accept the default
Box App Client Secret
Leave blank normally.
Enter a string value. Press Enter for the default ("").
client_secret>
At the prompt for a “Box App config.json location”, just hit “Enter” to accept the default
Box App config.json location
Leave blank normally.
Enter a string value. Press Enter for the default ("").
box_config_file>
Type, “1” for the box_sub_type; Rclone should act on behalf of a user
Enter a string value. Press Enter for the default ("user").
 Choose a number from below, or type in your own value
1 / Rclone should act on behalf of a user
  "user"
2 / Rclone should act on behalf of a service account
  "enterprise"
Edit Advanced Config? Up to you; In this example I said, “No”
Edit advanced config? (y/n)
y) Yes
n) No (default)
y/n> n
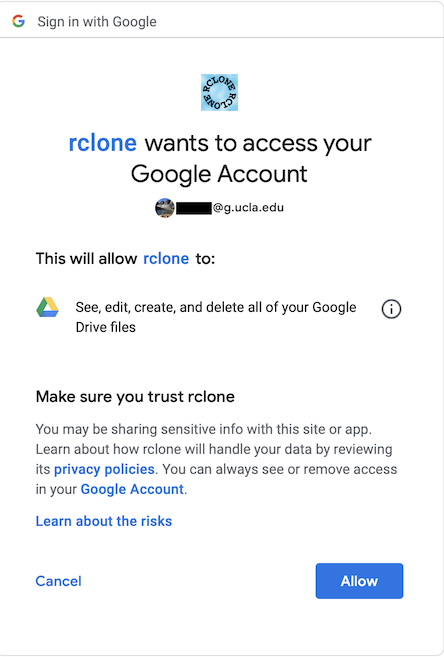
Use Auto Config? Say ‘Yes’ and wait for firefox to launch. You will need to authenticate with your UCLA Box external password and UCLA Shibboleth to authorize the application rclone’s access to your UCLA Box account
YourMagicTokenHerYourMagicTokenHere
your browser doesn't open automatically go to the following link: http://[FollowTheLinkInYourTerminal
Log in and authorize rclone for access
Waiting for code...
Got code
--------------------
[box]
type = box
box_sub_type = user
token = YourMagicTokenHere
--------------------
Type, “Y” to accept the new settings and save the configuration
y) Yes this is OK (default)
e) Edit this remote
d) Delete this remote
y/e/d> y
Current remotes:

Name                 Type
====                 ====
box                  box

e) Edit existing remote
n) New remote
d) Delete remote
r) Rename remote
c) Copy remote
s) Set configuration password
q) Quit config
e/n/d/r/c/s/q>
Set-up rclone configuration password
$ rclone config
No remotes found - make a new one
n) New remote
s) Set configuration password
q) Quit config
n/s/q>
Important
At this point you’re done, unless you want to password protect your rclone configuration (recommended). If you want to password protect your configuration, hit ‘s’ and follow the prompts to set your rclone password; then ‘q’ to quit.
Set-up rclone to sync with Google Drive
- In the following example we will:
configure rclone for a remote connection to your UCLA Google Drive
copy a file from the Hoffman2 Cluster to a new folder on Google Drive
Step 1: Create a folder on Google Drive
Note
We will be creating a new folder on your UCLA Google Drive to test a transfer later…
Connect your web browser to Google Drive
Select your g.ucla.edu account, e.g. login_id@g.ucla.edu (replace
login_idwith your UCLA Logon ID)Click on “new” and select “folder” and give it a name, e.g. “h2xfr”
Step 2: Configuring an rclone connection to your Google Drive
Tip
More detailed instructions can be found at https://rclone.org/drive/
SSH to one of our data transfer nodes and enable trusted X11 forwarding. You can connect directly to dtn1.hoffman2.idre.ucla.edu or dtn2.hoffman2.idre.ucla.edu or use the Domain Name Service (DNS) round-robin address, dtn.hoffman2.idre.ucla.edu, which load balances requests between the two servers.
$ ssh -Y login_id@dtn.hoffman2.idre.ucla.edu
Where login_id is replaced by your cluster user name
Type, rclone config
$ rclone config
No remotes found - make a new one
n) New remote
s) Set configuration password
q) Quit config
n/s/q>
Type, “n” for new remote [connection]
Enter a name for this connection, e.g. “gdrive”
Enter the type of storage from the menu - Google Drive. Type, “drive”
Type of storage to configure.
Enter a string value. Press Enter for the default ("").
Choose a number from below, or type in your own value
1 / 1Fichier
  \ "fichier"
2 / Alias for an existing remote
  \ "alias"
3 / Amazon Drive
  \ "amazon cloud drive"
4 / Amazon S3 Compliant Storage Provider (AWS, Alibaba, Ceph, Digital Ocean, Dreamhost, IBM COS, Minio, etc)
  \ "s3"
5 / Backblaze B2
  \ "b2"
6 / Box
  \ "box"
7 / Cache a remote
  \ "cache"
8 / Citrix Sharefile
  \ "sharefile"
9 / Dropbox
  \ "dropbox"
10 / Encrypt/Decrypt a remote
   \ "crypt"
11 / FTP Connection
   \ "ftp"
12 / Google Cloud Storage (this is not Google Drive)
   \ "google cloud storage"
13 / Google Drive
   \ "drive"
14 / Google Photos
   \ "google photos"
15 / Hubic
  \ "hubic"
16 / In memory object storage system.
   \ "memory"
17 / JottaCloud
   \ "jottacloud"
18 / Koofr
   \ "koofr"
19 / Local Disk
   \ "local"
20 / Mail.ru Cloud
   \ "mailru"
21 / Mega
   \ "mega"
22 / Microsoft Azure Blob Storage
   \ "azureblob"
23 / Microsoft OneDrive
   \ "onedrive"
24 / OpenDrive
   \ "opendrive"
25 / Openstack Swift (Rackspace Cloud Files, Memset Memstore, OVH)
   \ "swift"
26 / Pcloud
   \ "pcloud"
27 / Put.io
   \ "putio"
28 / QingCloud Object Storage
   \ "qingstor"
29 / SSH/SFTP Connection
   \ "sftp"
30 / Sugarsync
   \ "sugarsync"
31 / Transparently chunk/split large files
   \ "chunker"
32 / Union merges the contents of several remotes
   \ "union"
33 / Webdav
   \ "webdav"
34 / Yandex Disk
   \ "yandex"
35 / http Connection
   \ "http"
36 / premiumize.me
   \ "premiumizeme"
Storage>
Next, you will need to either create a Google Application ID [for best performance] or use the default internal key. Should you choose the default internal key, just press, ‘enter.’
Important
For best performance, you will need to create a Google Application ID. If you choose to do so, please refer to the steps outlined in, https://rclone.org/drive/#making-your-own-client-id
Your terminal should be here …
Google Application Client Id
Setting your own is recommended.
See https://rclone.org/drive/#making-your-own-client-id for how to create your own.
If you leave this blank, it will use an internal key which is low performance.
Enter a string value. Press Enter for the default ("").
client_id>


Google Application Client Secret
Setting your own is recommended.
Enter a string value. Press Enter for the default ("").
client_secret>
Question: What level of access do you want to give rclone? In this example, I’ve set it to ‘1’
Scope that rclone should use when requesting access from drive.
Enter a string value. Press Enter for the default ("").
Choose a number from below, or type in your own value
1 / Full access all files, excluding Application Data Folder.
  \ "drive"
2 / Read-only access to file metadata and file contents.
  \ "drive.readonly"
  / Access to files created by rclone only.
3 | These are visible in the drive website.
  | File authorization is revoked when the user deauthorizes the app.
  \ "drive.file"
  / Allows read and write access to the Application Data folder.
4 | This is not visible in the drive website.
  \ "drive.appfolder"
  / Allows read-only access to file metadata but
5 | does not allow any access to read or download file content.
  \ "drive.metadata.readonly"


scope> 1
In this example, I just hit ‘enter’ to accept the default
ID of the root folder
Leave blank normally.

Fill in to access "Computers" folders (see docs), or for rclone to use
a non root folder as its starting point.

Note that if this is blank, the first time rclone runs it will fill it
in with the ID of the root folder.


Enter a string value. Press Enter for the default ("").
root_folder_id>
In this example, I just hit ‘enter’ to accept the default
Service Account Credentials JSON file path
Leave blank normally.

Needed only if you want use SA instead of interactive login.

Enter a string value. Press Enter for the default ("").
service_account_file>
You can configure the advanced settings, in this example, I did not…
Edit advanced config? (y/n)
y) Yes
n) No (default)
y/n> n
In this example, I’m saying ‘no’ to auto config and just copy and paste the link in my web browser
Remote config
Use auto config?
 * Say Y if not sure
 * Say N if you are working on a remote or headless machine
y) Yes (default)
n) No
y/n> n
Now copy the link provided in your configuration and paste in your web browser to give rclone access to your UCLA Google Drive
Please go to the following link: https://PleaseFollowTheLinkOnYourConsole/
DO you approve?
Copy and paste the verification code from your browser window
Enter verification code>


Configure this as a team drive?
y) Yes
n) No (default)
y/n> n
Review the remote settings and type “y” to save the connection
--------------------
[gdrive]
type = drive
client_id = [This will list your client_id]
client_secret = [This will list your client_secret]
scope = drive
token = [This will list your token]
--------------------
y) Yes this is OK (default)
e) Edit this remote
d) Delete this remote
y/e/d> y
Current remotes:

Name                 Type
====                 ====
gdrive               drive

e) Edit existing remote
n) New remote
d) Delete remote
r) Rename remote
c) Copy remote
s) Set configuration password
q) Quit config
e/n/d/r/c/s/q>
Important
At this point you’re done and have the option to password protect access to rclone. If you choose to set a password, you will need it every time you use rclone.
Set a password (s) or quit (q) rclone config
Current remotes:

Name                 Type
====                 ====
gdrive               drive

e) Edit existing remote
n) New remote
d) Delete remote
r) Rename remote
c) Copy remote
s) Set configuration password
q) Quit config
e/n/d/r/c/s/q>
Using rclone
rclone command list
The following table lists some of the available rclone commands. For the exhaustive list, please refer to the rclone website.
command |
description |
|---|---|
|
|
|
|
|
|
|
|
|
|
|
|
|
|
|
|
|
|
|
|
|
|
|
|
|
|
|
|
|
|
|
|
|
|
|
|
|
|
|
|
|
|
|
|
|
|
|
|
|
|
|
|
|
|
|
|
|
|
|
|
|
|
|
|
|
|
|
|
|
|
|
|
|
|
|
|
|
|
|
|
|
|
|
|
|
|
|
|
|
|
|
|
|
rclone flag list
rclone has a number of options to control its behavior.
Options that take parameters can have the values passed in two ways, --option=value or --option value. However boolean (true/false) options behave slightly differently to the other options in that --boolean sets the option to true and the absence of the flag sets it to false. It is also possible to specify --boolean=false or --boolean=true. Note that --boolean false is not valid - this is parsed as --boolean and the false is parsed as an extra command line argument for rclone.
Options which use TIME use the go time parser. A duration string is a possibly signed sequence of decimal numbers, each with optional fraction and a unit suffix, such as “300ms”, “-1.5h” or “2h45m”. Valid time units are “ns”, “us” (or “µs”), “ms”, “s”, “m”, “h”.
Options which use SIZE use kByte by default. However, a suffix of b for bytes, k for kBytes, M for MBytes, G for GBytes, T for TBytes and P for PBytes may be used. These are the binary units, e.g., 1, 2**10, 2**20, 2**30 respectively.
The rclone global flag list is available to every rclone command and is split into two groups, non backend and backend flags.
rclone copy
Note
For more detailed information, please refer to the rclone copy page on their website.
rclone copy - copies the source to the destination, skipping already copied
Synopsis
Copy the source to the destination. Doesn’t transfer unchanged files, testing by size and modification time or MDSUM. Doesn’t delete files from the destination.
Note that it is always the contents of the directory that is synced, not the directory. SO when source:path is a directory, it’s the contents of source:path that are copied, not the directory name and contents.
$ rclone copy source:path destination:path [flags]
Note: Use the -P/--progress flag to view real-time transfer statistics
Hint
See the –no-traverse option for controlling whether rclone lists the destination directory or not. Supplying this option when copying a small number of files into a large destination can speed transfers up greatly.
Example: Using rclone to copy a file to Google Drive
Let’s copy the rclone zip file from the Hoffman2 Cluster to your Google Drive, h2xfr folder
dtn1:~$ rclone copy rclone-current-linux-amd64.zip gdrive:h2xfr
Enter configuration password:
password>
2020/04/06 16:40:20 INFO  : rclone-current-linux-amd64.zip: Copied (new)
2020/04/06 16:40:20 INFO  :
Transferred:              11.177M / 11.177 MBytes, 100%, 3.671 MBytes/s, ETA 0s
Transferred:            1 / 1, 100%
Elapsed time:         3.0s
dtn1:~$
‘rclone-current-linux-amd64.zip’ is the file in your current working directory that you want to transfer from the Hoffman2 Cluster to Google Drive.
‘gdrive’ is the name of the connection you gave when you configured your rclone connection and ‘h2xfr’ is the name of the folder you created in Google Drive.
If you configured a password for rclone, you will be prompted for it before the file is sent.
That’s it, the file has been uploaded. You can view the remote end with the ls command.
dtn1:~$ rclone ls gdrive:h2xfr
password:
11913756 rclone-v1.51.0-linux-amd64.zip
It may be useful to view the contents of your remote connection before uploading or downloading files. To do so without having to use a browser, use the following commands:
rclone lsd [remote]:
** Replace remote: with the name of your remote connection, e.g. gdrive or box
To view the contents of a specific directory, e.g. ‘h2xfr’ in your Google Drive, use the command:
rclone ls gdrive:h2xfr
If you want to test a command, use the
--dry-runflag. Below assumes the name of your rclone remote connection to Google Drive is named, ‘gdrive’ and the directory you’re syncing to is named, ‘h2xfr’
rclone [command] --dry-run gdrive:h2xfr
scp
For security reasons, the Hoffman2 Cluster allows file transfer only with scp or sftp or grid-ftp. For the same reason, you should use an scp or sftp client on your local machine. You should not use the scp command on the cluster.
The scp and sftp commands transfer files using the secure shell protocol (ssh) in which data is encrypted during transfer. The use of scp requires that an scp client be run on the machine that you use to initiate the transfer and that it communicate with a server run on any other machines which participate in the transfer. The Hoffman2 Cluster, like most Linux and Unix systems, runs both a client and a server.
There is an scp client command on desktop Linux/Unix systems and on macOS (use Terminal). On Windows, you usually have to install an ssh client which comes with an scp program.
The syntax of the Linux/Unix scp command is very similar to the cp command. For complete scp syntax, enter:
man scp
Here is a simplified scp syntax that accomplishes most transfers:
scp [-r] source target
where source is the name of the file on your local machine, and target will be the name of the file on the cluster.
For the source on your local machine, specify an absolute or relative file name or directory name. You can use wild cards to transfer multiple files to an existing target directory. Specify -r to transfer a whole source directory and its files.
For the target on the cluster, specify your login_id and the Hoffman2 Cluster address, followed by a colon (:), followed by the file specification. You can specify the directory where the file is to be saved, or a dot “.” meaning the same name in your home directory, or an absolute or relative path including a new file name.
For large files or large amounts of data, use the Hoffman2 Cluster data transfer nodes (dtn.hoffman2.idre.ucla.edu). You can connect directly to dtn1.hoffman2.idre.ucla.edu or dtn2.hoffman2.idre.ucla.edu or use the Domain Name Service (DNS) round-robin address, dtn.hoffman2.idre.ucla.edu, which load balances requests between the two servers.
login_id@dtn2.hoffman2.idre.ucla.edu:filespec
For example:
scp myfile login_id@dtn2.hoffman2.idre.ucla.edu:.
will transfer the file named myfile from your current directory on your local machine to your home directory on the Hoffman2 Cluster. Its name on the cluster will be $HOME/myfile
sftp
secure file transfer program
sftp is a file transfer program, similar to ftp, which performs all operations over an encrypted ssh transport.
It may also use many features of ssh, such as public key authentication and compression.
Command |
Function |
Example |
|---|---|---|
cd |
Change remote directory to path |
cd [path] |
lcd |
Change local directory to path |
lcd [path] |
ls |
Display remote directory listing |
ls |
lls |
Display local directory listing |
lls |
pwd |
Display remote working directory |
pwd |
lpwd |
Print local working directory |
lpwd |
mkdir |
Create remote directory specified by path |
mkdir [path] |
get |
Retrieve the remote path and store it on the local machine |
get remote_path [local_path] |
put |
Upload local-path and store it on the remote machine |
put local_path [remote_path] |
exit |
Quit SFTP |
exit |
quit |
Quit SFTP |
quit |
help |
Display help text |
sftp help |
For complete syntax, please refer to the man page.
$ man scp
Let’s establish an SFTP connection
Note
For large files or large amounts of data, use the Hoffman2 Cluster data transfer nodes (dtn.hoffman2.idre.ucla.edu). You can connect directly to dtn1.hoffman2.idre.ucla.edu or dtn2.hoffman2.idre.ucla.edu or use the Domain Name Service (DNS) round-robin address, dtn.hoffman2.idre.ucla.edu, which load balances requests between the two servers.
Replace login_id with your cluster user name below. This is an example of using the sftp client on macOS Terminal:
$ sftp login_id@dtn.hoffman2.idre.ucla.edu
login_id@dtn.hoffman2.idre.ucla.edu's password:
Connected to login_id@dtn.hoffman2.idre.ucla.edu.
sftp>
Now let’s move a file from our local computer to the Hoffman2 Cluster
Replace login_id with the user name on your local computer. What is my current local working directory? and what files are listed:
sftp> lpwd
Local working directory: /Users/login_id/share/
sftp> lls
a.out  index.html
What is my remote working directory?
sftp> pwd
Remote working directory: /u/home/l/login_id
Let’s create a new directory on the remote computer and change our working directory to it
sftp> mkdir uploads
sftp> cd uploads
Copy file, “a.out” from local computer to the Hoffman2 Cluster
sftp> put a.out
Uploading a.out to /u/home/l/login_id/uploads/a.out
a.out                                                                                    100% 3125   703.0KB/s   00:00

sftp> ls
a.out
rsync
The rsync command uses the SSH2 protocol to efficiently transfer files. It is perhaps most useful in keeping groups of files on different computers up to date with each other.
Here is a 2-part example of discovering the status of files in a common directory named mydir. It is comparing files in your Hoffman2 Cluster $HOME/mydir directory with those on your local machine mydir directory. You need both parts to ensure any new files from either source are synchronized.
Note
For large files or large amounts of data, use the Hoffman2 Cluster data transfer nodes (dtn.hoffman2.idre.ucla.edu). You can connect directly to dtn1.hoffman2.idre.ucla.edu or dtn2.hoffman2.idre.ucla.edu or use the Domain Name Service (DNS) round-robin address, dtn.hoffman2.idre.ucla.edu, which load balances requests between the two servers.
Please replace login_id with your cluster user name.
Part 1: Run this on your local machine:
$ rsync -an --itemize-changes login_id@dtn2.hoffman2.idre.ucla.edu:mydir .
Any files prefixed with > in the output are different on the Hoffman2 Cluster and you may want to download them from the Hoffman2 Cluster (get):
$ rsync -av login_id@dtn2.hoffman2.idre.ucla.edu:mydir .
Part 2: Run this on your local machine:
$ rsync -an --itemize-changes mydir login_id@dtn2.hoffman2.idre.ucla.edu:
Any files prefixed with < in the output are different on your local machine and you may want to upload them to the Hoffman2 Cluster (put):
$ rsync -av mydir login_id@dtn2.hoffman2.idre.ucla.edu:
For more information about the rsync command and additional options, enter man rsync at the shell prompt
$ man rsync
MobaXterm
MobaXterm is a Windows application that provides an enhanced terminal with an embedded X11 server for accessing remote computers using various protocols, such as SSH.
After you start an SSH session to a remote computer, you have the option to display remote GUI applications. To see this in action, please see the live demo
Installing MobaXterm
You can download and use MobaXterm Home Edition for free. Instructions for MobaXterm documents how to download and configure the application to connect to the Hoffman2 Cluster.
Using MobaXterm for data transfer
When you start an SSH session to a remote computer, a graphical SFTP browser pane opens to the left of the command-line pane and allows you to:
browse the remote computer’s filesystem
transfer files using a secure SFTP connection
or even open and edit your remote files using the many Unix tools packaged with MobaXterm
The graphical SFTP browser pane allows you to drag and drop files (similar to File Explorer in Windows) to transfer to/from the remote computer.
Click on Sessions > SFTP from the menu bar… <— Sample text